Monday, February 15, 2010

Easing Through the East-the first few days

It's been a lot of work planning this trip! The past few weeks I've been spending my idle hours at my school library, where I can take advantage of US road atlases and an internet speed that can handle google maps (my apartment internet is a little flakey). I bring along our National Geographic Guide to National Parks and a notebook. I edit Word files listing campsites, route ideas, and other growing bodies of information. I email park rangers about camping permits. I also save PDF maps and state and national park brochures. Our United States make up a very large and overwhelming landscape, and it takes a lot of information sorting and decision making to plan a route that will be enjoyable and possible.
And now, after all of this hard work, of which there will be much much more to come, I have the first.........four or five days planned!!! Yes it's going to be a long winter yet. All of this planning makes me both anxious and tired. Sometimes the route planning gets overwhelming, and I feel like grabbing a big road atlas, packing the bike and leaving tomorrow. At the same time, I want to plan carefully enough so that we don't find ourselves in Strip Mall Land every 30 miles, sitting in traffic behind a filthy minivan full of suburban rats drinking plastic milk-shakes out of styrofoam cups. So I think all this map-looking, finding the roads with green dots next to them, will pay off.
So here is the first leg of our trip, which will take four or five days depending on how much sight-seeing we do.  The first portion of our trip will bring us to Rhinebeck, NY. The plan so far is to attend the Rhinebeck Grand National Supermeet the weekend of June 11-13. Last year this was lots of fun, and we thought it would be a good jumping off point/event.


Here is my idea for the leisurely route to Rhinebeck, which is in the Hudson Valley:

View NH to Rhinbeck in a larger map


We'll probably leave the Meet late Sunday afternoon. From Rhinebeck, we'll take NY209 to the Delaware Water Gap, spending our first night in the Delaware State Forest. The next day will be a busy one. We're going to stop in Nazareth, PA, to see the Martin Guitar Factory. They have free guided tours, which sounds very fun! From Nazareth we'll make our way down to Micheax State Forest for our second night of camping. This is near Gettysburg, which we'll visit either that evening or the next morning.
View Pa Nazareth to Gettysburg in a larger map


Our next night will be somewhere along the Blue Ridge Parkway, depending on how many stops we make in the Appalachian mountains. We're going to take the Skyline Drive, then the Blue Ridge Parkway all the way to the end, in North Carolina.
View Gettysburg to the Blue Ridge Mountains in a larger map
Somewhere near the end of the Blue Ridge Parkway, we'll spend another night camping. I have a list of possible campgrounds, but I don't want to choose one now. Again, this will depend on how many stops we make, or if we do any of the short hikes along the parkway.

So far I am looking at 250-300 mile days. This figure will change as we enter different parts of the country. Oklahoma may be a 500 mile per day state, while the Sierra Nevada in California may
be a 100 mile per day region. A quick, superficial google maps search indicates that from NH to
California to Portland and back, avoiding highways, would be a 7,300 mile trip. So perhaps we should throw on a couple thousand miles worth of scenic byways and excursions. If we traveled 10,000 miles, averaging 250 miles per day, we would need 40 days to complete the whole trip. I think we're in good shape considering our eight available weeks!

A tool I didn't mention here but have in the past is the adventure rider's forum. I put up a few posts
asking for route suggestions, particularly in Eastern PA. The route in the google map above, going from Nazareth to Gettysburg, is one that was suggested to me by some folks on the forum. Some of the roads in that map were ones I had already considered, but it's great to get first-hand advice from motorcyclists
who are always seeking out good roads. And, one part of the route that I hadn't discovered is the
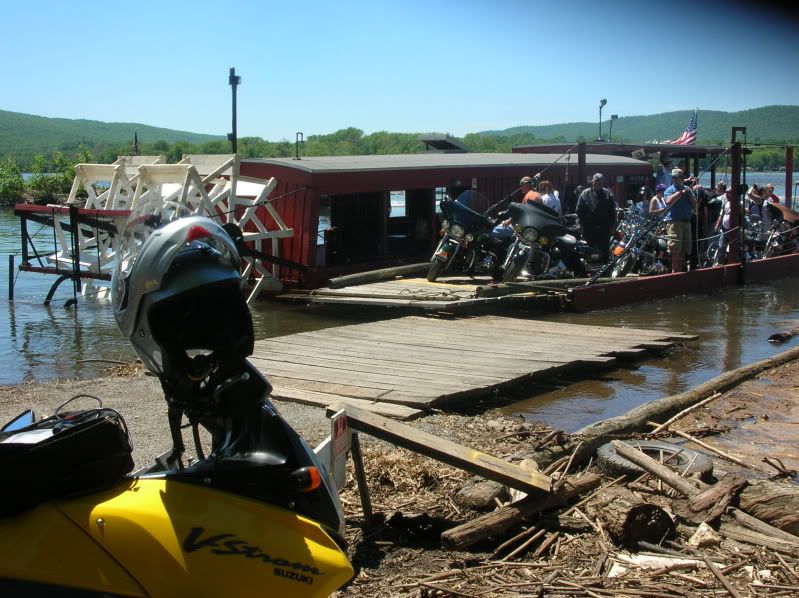
ferry crossing at Millersburg, PA. You cross the Sesquahana River on an old ferry boat. Looks like fun!It's stuff like this that will make this a great trip.


Watch for more posts about route ideas, and if you have any, feel free to comment!
Sunday, January 17, 2010

Out of Hibernation

Happy New Year!
Our last post was on the heels of a chilly but wonderful motorcycle ride in late November.  Oddly, despite tonight’s snowstorm, this post is on the heels of another chilly but wonderful ride!  
Yesterday that nasty old man winter, who usually occupies this corner of the world sometime between September and June, took a much needed holiday, leaving us with a bright, sunny, 45° Saturday. Naturally I got antsy and took the Honda out of hibernation.  After a quick wipe down the bike was ready, and I was off for a twenty-mile back road ride.  It was beautiful and rekindled my sense of adventure, making me itch for the real spring, when our trip will only be weeks away.
This Christmas our family was rather generous, giving us lots of stuff that we can use for our trip.  Also, we bought those green dry boxes mentioned in the previous posting.  For a mere $24.99 each, we got two reasonably rugged and large cases that can hold lots of our gear.  Here it is held up to to the bike:


It will be mounted a couple inches further back, to give more leg room to the passenger (this will be Julianne and me alternately.  I am not too proud to ride pillion!)


Here's a shot of our new gear:
The two square things are towels of the microfiber variety.  These are quick-drying, light weight, and compact.  The lantern is the Apollo mentioned in a previous post.  It's folded up in this picture.  The big spoon folds up like the spatula next to it, and the utensils still in the packaging are of a similar material.  These things are cool.  They weigh nothing and are very compact.  There's also a headlamp, which will be handy if we have to setup camp at night.  
Not pictured are our cookset, which we bought earlier this fall, our sleeping pads (we bought the Thermarest Prolite pads), GSI JavaPress, and the sleeping bags and tent.  
We still require a stove, and after speaking to a guy at EMS (Eastern Mountain Sports for you non-yanks), we're convinced we need an MSR Whisperlite International.  This stove runs on white gas, or gasoline or kerosene if you're in a pinch.  Originally we thought we'd want a canister stove, like the Coleman F1 we mentioned before.  They're extremely lightweight and small, but we were worried about the cost and availability of the isobutane/propane canisters they require.  The EMS guy said he liked his Whisperlite and had just used it on a hike of the Appalachian Trail.  He gave us the impression that the Whisperlite is efficient, as a 20 ounce bottle lasted him around five days using the stove for two meals a day.   
Also, I like this stove for its durability.  A quick online search will show that these stoves have been around a while, and are regularly used in the roughest, coldest, hottest, and highest conditions.  I like that it comes apart easily for cleaning and that you can buy all the parts and tools you need for it.  That is a mark of quality.  While it's slightly bigger and heavier (it weighs about 1 pound) than the canister-type stoves, the Whisperlite seems like a good choice for us.  Our Christmas gift certificates to EMS will likely go towards this stove.  We still have a few things to get, including a water carrier, one of those foldable buckets, a couple more stuff-sacks for clothes, and some other things, but we've got a great start. 


A Route to the Pacific
Trying to find a good route across the whole country and back using only the scenic roads is kind of a daunting task.  We've done a lot of reading and research on the great roads and regions across the country.  The Adventure Rider forums are a great source for stuff like this.  One major component of the trip will be the National Parks and National Forests.  These will be like dots that we need to connect.
So the big picture looks like this: From New Hampshire we're going southwest toward the Hudson Valley, down through Pennsylvania (Delaware Water Gap), and into northern Virginia, where we'll get on the Blue Ridge Parkway.  That will take us all the way down to the Chattanooga region.  From there it's going to be west toward Memphis.  For this leg of the trip, we have a detailed route figured out.  From this point west, it's less specific until we figure out more details about roads and routes.  
We'll go west across Arkansas or southern Missouri, eventually crossing into Colorado.  We want to see lots of parks in the four-corners region, and we haven't figured out an exact route through this region that allows us to see everything there.  So there will probably be a lot of hop-scotching around that area. 
After this it's west toward the Sierra Nevada in California.  We'll see the Yosemite region before going further west until we finally reach the Pacific Coast highway.  North from there to the Cascades region and the Portland area.  We'll explore that region for a while, hopefully. 
Then it's back East toward Yellowstone.  After Yellowstone it's further East to the Black Hills of South Dakota, across to Chicago, and pretty much straight home from there, as there isn't much between Chicago and New Hampshire that we especially want to see. 
So, the major focus areas where we'll spend the most time will be the Appalachian region, the four corners (Utah/Colorado/New Mexico/Arizona), the Sierra Nevada, coastal California and the Redwoods, the Cascades and Columbia River regions of the Northwest, Yellowstone, and the Black Hills of South Dakota. The places between these places will certainly be fun to see, but these are the areas where we're hoping to spend some time doing day hikes and sight-seeing.  
And, of course, we're open to suggestions for more places to see along the way!  We would love to hear about interesting places and routes, so feel free!
We'll definitely keep posting about new developments on the routes.  So stay tuned!
Jeremy B


Sunday, November 29, 2009

Let Us Give Thanks for Vintage Hondas


What a great Thanksgiving weekend!  Today Juli and I decided to go on a short hike up Blue Job Mountain, not far from us in NH.  It's a little mountain, and the trail isn't long, but its unique position means great views in all directions.  You can see into the White Mountains, East to Maine, bits of the seacoast, and West toward Vermont.
Anyway, despite today's late November date, the weather was nice, mid 40s and sunny.  So we took the Honda!  The picture above is Juli and the Honda at the trail head.  We wore many layers!  On the way there, a couple of the roads we wanted to take turned out to be dead-ends.  The Honda has seen some mild off road duty, and handles it well, but I didn't think we'd make these ones, especially with two on the bike.
What a great ride, though!  We found some great roads we've never been on.  It's interesting to ride when all the leaves are gone because you see things you wouldn't notice in the summer.  For example, the view of Bow Lake from Province Road was beautiful!  Somewhere in Strafford we were behind an old, gray Jeep CJ7.  The sounds and smells from that jeep filled me with great memories.  We always had cj's growing up, and sound of the 258ci straight six engine of the AMC era jeeps is one of the more enduring memories I have kept from childhood.
It was a great day, and probably our last ride of the season.  When we got home I added Stabil to the gas tank and parked the bike in the tent behind the garage.  Sad, but the reality is that we may not see many more days above 40 degrees, and that's cold enough for me.  From now until Spring the focus will be the repairs and maintenance items listed in the older post.


On another note, we made some great discoveries in the luggage realm.  First off, on our way back from Thanksgiving dinner Juli and I stopped at a bike dealer in Maine.  I have been wanting to see the new Moto Guzzi V7 in person since it came out, so we made a special stop.  That bike, by the way, is absolutely beautiful.  The perfect size, stance, style.  I was thoroughly impressed!  Anyway, at the dealer we saw a nice little top trunk from EMGO that looks to be the perfect size for our rear rack.


Best of all it's relatively cheap!  I looked at some nice cases from name brands and they're great, but many of them cost over $200!  It was great to see this trunk in person and witness just how sturdy it was.

Speaking of cheap, we had a new idea for side cases as well, and it came from the redneck world of Cabelas!  Don't get me wrong, I like Cabelas; in fact our tent came from them and it is excellent!

There is lots of talk on the adventure rider's forum about using ammo cans for side cases.  It's cheap and easy, but those things are very heavy, and our little bike can't carry a ton of extra weight.  And as much as I like the Pelican style boxes I mentioned before, they are pretty heavy too.  That's why I like these plastic boxes from Cabela's:


They're called Magnum Field Boxes, made by a company called Plano.  They appear to be rather tough, light, and are bigger than the Pelican's I was looking at.  They're also top-loading, which could be handy.  These are also cheap, around $25!!  Next time we're in Maine, we'll stop at the Cabela's store and see them in person.  That way we can judge whether they'd be tough enough for what we want to do.

Also, this weekend we looked at some travel books and I found one that I really like from National Geographic.  It's their guide to scenic highways and biways.  As a gauge for the quality of routes described, I looked at the New Hampshire section.  They mentioned Route 302 and the Kancamangus Highway, as they should.  But they also mention Route 153, which snakes up the east side of the state.  My dad discovered this road on his Royal Enfield and raved about it.  It is off the beaten path, but a great ride, so it seems that National Geographic is good at judging great routes!  It will be a great tool for finding those small, twisty, hilly, narrow roads we hope to stick to on our trip.

Hope everyone's Thanksgiving was great.  With all this planning and fun we had this weekend, Juli and I both feel thankful.
Seeya
Jeremy B

Thursday, November 19, 2009

Preparation H (for Honda): Getting the bike ready

Earlier I mentioned what repairs, replacements, rebuilds, I have done to the bike to get it ready.  After spending countless hours reading on the SOHC4.net forums, I have a good idea of what goes wrong on these bikes and what items should be looked at before a long trip.  So this is my to-do list for the winter.  Like last winter, these jobs will be spread out over time as I have time and money to complete the projects.
Here's what I'll do:


Front End:
Rebuild front fork with new seals and oil
wheel bearings
   -There is a squeak coming from the front end sometimes that I fear may be dried out bearings.  A seizure would be somewhat catastrophic.
clean and adjust brake caliper, add new brake pads
  -brakes are also squeaky, not sure why but this should fix it.
Stainless steel brake hoses
   -This is one of the best upgrades on these old bikes.  It quickens the response of the front brake and    resists fading as you squeeze the lever.  Those old rubber hoses are probably unsafe anyway, so whey not replace them with the best?
Tapered Roller Steering head bearings
  -Not sure the bike needs this repair right now.  It's more of an upgrade that improves handling.  I will do it if funds allow.

Electrics
Fix electric start
  This may involve replacing the solenoid, or the switch. I am not sure why the starter doesn't always spin.  One issue is that the normal starter button is missing and the previous owner hacked into the wires by the left side cover and added his own push button switch.  That'll also be fixed.
Clean and lubricate all electrical connections
 This can make a big difference on these old bikes.  The SOHC Honda charging system doesn't offer much extra juice, so corroded or dirty connections can really affect brightness of lights, switches, and even how good the thing runs.  I'll unplug each connector and polish it, then put it back together with dielectric grease.
Replace/fix Horn
 Not sure why the horn doesn't work because I haven't looked into it.  It's the switch, a connection, or possibly the horn itself.  Fortunately a horn can be had for like $10

Tune Up/Maintenance
New points/condensers
I have no idea how old these parts are, so since they're cheap I'll go the safe route and get new ones.  I also intend to keep an extra set on the bike.  I have contemplated getting the electronic ignition for this bike, but we'll see if funds allow.  Points are nice because they're so simple you can fix on the side of the road.  Electronic ignition is maintenance free and will probably never fail, but if it did I would have no way to fix it while on the road.
Clean and synchronize carburetors again
 I think the bike is running rich, so I want to take the carbs off, clean them, recheck float levels, and re-sync them.  Over the summer I invested in a fancy carb sync tool, so that job isn't so bad.  What is bad is taking the carbs off and putting them on again.  That has been the least pleasant job on this bike.  I should be damn good at it after doing it so many times trying to get the carbs right, but alas, it still sucks.
New Chain and Sprockets
I have no idea how old the ones on the bike are.  The chain is definitely done for, and they recommend doing the sprockets at the same time.  Unfortunately the CB500 cannot use an o-ring chain, they're too wide and rub against the engine case, possible wearing a hole through it (ouch!).  A standard chain is cheaper though!  Sprockets are pretty cheap for this old girl too.
Maintenance Schedule
Routine stuff all in the first section of the manual.  Check and adjust cam chain, valve clearance, timing, etc.  This is easy and won't cost any money (provided I don't break anything).


Chassis
Swing Arm Bushings
These were a weak point on the old Hondas, one of the few things that didn't last long.  There are aftermarket bronze bushings that work better.  Mine may not be bad, but I want to replace them anyway as the bike will be at or above load capacity with the girl and me plus luggage.  Plus, I think it would be good to take apart, clean, and re-lubricate the swing arm pivot shaft.  That grease is 38 years old.


New Rear Tire, tube, rim strip
Ahh, spoked wheels.  Standard size for this bike is 3.50-18.  The old inch-sizes are not hard to find, but you don't get much of a selection.  I think I'll go with a Dunlop 4.00-18, which seems to work on these rims.  Dad's Royal Enfield runs these and I really like them for dirt roads.  I am going to try this job on my own, we'll see how that goes.   I guess I should check the spokes for tension and the wheel for balance while I have it off.

Rear wheel bearings
Probably past their prime as well.  Not something I want to deal with on the trip, so I'll do them as a precaution.


Aesthetics
Repaint exhaust headers
Last winter I painted the exhaust headers because the chrome was really crappy and a couple of them were a little rusty.  Brilliantly I chose engine enamel in a spray can, not realizing that engine enamel is not heat-resistant enough for exhaust pipes!  So my nice black headers have been slowly reverting back to crappy gray.
Here's what that project looked like.  I came up with an ingenious method of painting the individual pipes!  Here's before and after, then shown reinstalled on the bike.  This was before I had done the seat and gas tank, among other things.


I may also repaint the tank and side covers with a fresh coat of green.  I never took the time to sand and polish my original green paint job, so if I have time I'll redo it.

So there's my to do list!  Some of these repairs have been covered in Motorcycle Classics magazine's series on their project CB500, so for some things I have a nice, full color set of instructions in the vernacular language.  I also have the amazing resource of sohc4.net, which has helped me immensely so far.
Please note, parents and others, that most of the repair items I have lined up here are mainly to improve the safety of the bike.  I could probably ride it to Alaska tomorrow, but I want the bike to be as safe and reliable as I can make it!

Please stay tuned for more exciting posts!
Jeremy B

Wednesday, November 11, 2009

Recent Ride and Sleeping Pads!

Riding the country on our little old Honda will surely be exhausting, so we're investing in a good summer's sleep!  We've already got the tent and sleeping bags, and just last week I got two Themarest Prolite sleeping pads!
 These things are awesome.  They roll up to 4"x11" and weigh one pound each.  They're only about 1" thick when inflated, but they'll provide a cushion from the ground as well as an insulating value.  These were a big expense, one of the largest single purchases for camping stuff, but there was a sale at EMS so I figured we'd take advantage.
There is still tons of other stuff we need to get (see our earlier posting) but it feels good to check off two of the biggies.

Sunday, November 8 was a glorious fall day here in New Hampshire.  I was home for the weekend and took what may be my last motorcycle ride of the year.  Originally I thought I'd ride to one of the local ridges but the weather kept getting better so I continued through the country to the seacoast.  The bike was running great but I discovered a couple of issues that will need to be addressed over the winter.  First of all, it's vibrating too much for a Honda four cylinder.  So much, in fact, that one of the tiny screws that hold the tachometer gauge face vibrated loose and fell off, leaving me with a wobbly tach face!  It's not easy to get inside the tach to fix this, but luckily my favorite magazine, Motorcycle Classics, did a feature on how to take apart the old honda gauges.   I think the vibration is simply due to the need for a tuneup.  I need to sync the carbs again and check valve clearances, all routine stuff that hasn't been done in a while.
The back tire is about spent.  I don't know how much further I dare go on it.  I plan to replace it myself, so if you're bored and in the need of some humor at another's expense, you can come over and watch me try to change the tire!
Also, the front end is squeaky.  I need to take apart the caliper and clean it, and I probably need to replace the wheel bearings as well.  Despite the relatively low miles shown on our bike, I think the age alone of some components (like bearing grease) can merit replacement.

Speaking of mileage, Sunday's ride almost put my bike's mileage over 18,000!  I was about 30 miles shy of crossing the big 18k.  Oddly, my Subaru is currently about 30 miles shy of crossing over the 180,000 mile mark!  Hmm.

Another thing!  Apparently clicking the "follow" thing on my page really does nothing other than tell me you're interested in the blog.  You won't get an email or anything telling you when I've updated the blog, so please bookmark the blog and check back every few days to see what's new!

Next couple of blogs will discuss route ideas, as mentioned before, and a list of what I still need to do to the bike to prepare for the trip.
Cheerios!
Jeremy B

Friday, October 30, 2009

The Bare Necesseties-Just add-venture


Let me just reiterate the fact that Julianne is an art student and I am a music student.  In case that doesn't bring up any connotations for you it basically means that we are poor as f$%k!  We're not touring the country on a new BMW or Harley checking into hotels every night.  That is expensive and boring.  We're going to rough it, so it's good that we're poor because we wouldn't have it any other way.

So the necessities for the trip will include full camping gear, which will have to (a) fit on the bike and (b) be lightweight so as not to overload the bike.  Lucky for us there's another group of adventurers who have already figured out small and lightweight gear: the backpackers.  Backpacking tent, sleeping bags, stoves, etc, are all very small and very lightweight, not to mention excellent quality.  Their gear does, after all, need to last months at a time in the wilderness.  Here is a tentative list of what we think we'll need.  After the list I'll go into detail about individual items.

Sleeping
Tent
Sleeping bags
sleeping pads
tarp (for under the tent)

Cooking
stove
fuel bottles for stove
cookset
water container (probably inflatable)
foldable water bucket
utensils
lighter
dish towel
soap (multi-use)
2 nalgene bottles
coffee percolator or press

General Camping
hatchet
knife
lantern
head-lamp
towels
sun block
bug repellent
first aid kit
tooth brushes and paste, hairbrush, deoderant, etc
maps


--The following lists are things that won't come from the backpacking world and I'll discuss them later--


Tools
spark plug wrench
#2 phillips and flat screwdrivers
wrenches (don't know exactly what sizes I want to bring yet)
allen wrench (I replaced a lot of screws with SS allen head bolts)
Pliers (leatherman possibly)
tire repair kit (not sure what type yet)
Electrical tape
zip ties
tappet feeler gauge
chain lubricant
quart of 10W40 oil

Parts
spark plugs
tail light bulb
signal light bulb
spare main fuses
points set

electronics
camera
blackberry (we originally were going to bring a laptop, but this can replace it for our purposes)
charger for camera and blackberry
solar charger for blackberry


First off, sleeping.  We have already acquired a tent and sleeping bags.  The tent is a Cabela's brand ultralight tent, which we bought over the summer and have already tried out a few times.  It's light for its size, around six pounds, and packs small .  We got the three person tent for the extra room; this thing will be our house for the summer after all.  It's great sleeping without the fly, and the fly is very water resistant for crappy weather.

Juli just got two sleeping bags!  They're synthetic backpacking sleeping bags and are also very small and lightweight.

We are thinking of getting sleeping pads as well.  These are small, thin air mattresses used in the backpacking world.  We are looking at the Thermarest Prolite, which is a self-inflating pad, a big selling point for me.  One of the most irritating things in the world is blowing up an inflatable with your mouth, and I don't think we'll be too excited to do it every night after a full day of riding!   This thing packs really small, around 5X11 inches and only weighs 1 pound.
There are a couple of comparable pads by Big Agnes and Exped.  The Exped pads are awesome, but about twice the weight of the Prolite.  More expensive, too.
We're also considering a traditional foam sleeping pad, and I really like this one from Thermarest.  I like that it doesn't inflate it can never puncture and become useless.  It is very light but doesn't pack quite as small as the Prolite.  It's much cheaper, though, and I wonder if that will outweigh the benefits of self-inflating pads.  Ultimately, I think we'll decide on one of these after comparing them in the store.  It will have to pass the comfy test.


Now onto cooking. I have pretty much picked out a stove. This
is the Coleman F1 Ultralight. The picture shows the stove on top
of the canister. Originally I didn't want one that uses this type of canister because I wasn't sure it would be easy to find them on
the road.
But I have just discovered that a certain big box conglomo that
shall remain nameless carries them, so I think we'll find them
okay. They also have a couple of light stoves there, but not this particular one.  It will have to be ordered on the web.  This little
guy weighs 2.7 ounces as opposed to the one in the store that is
over a pound!


I have two different cooksets in mind.  One is the  MSR Quick 2, which is very complete yet compact.  It includes two pots, two dishes, two stainless mugs, a strainer top, and it all fits into a 7x5" package!  I am also looking at the GSI Pinnacle Dualist.  It is similar in size and weight to the MSR set, but it doesn't have normal shaped mugs or plates, which I don't like.  It does come in a bag that doubles as a water bucket, which is awesome!  It also includes two utensils, which the MSR does not.  Still, I really prefer the shape of the dishes and mugs of the MSR set.  Also, the GSI only comes with one pot.  Two could be handy on the road.

Coffee!  Some may consider this a luxury item and not worth the weight, space, or trouble, but Juli and I really like coffee and I think the trip will be too exhausting to go without.  I can't decide if we should get a percolator or a press.  There is the Open Country 2-5 Cup Perk, pictured at the left, which is about 5X5 inches and weighs 9 ounces.  I like the simplicity of using a percolator. But a coffee press, like the GSI JavaPress seems like a good idea.  I really don't know how it works.  You put some hot water and coffee into it and "press" the coffee through the water, supposedly making coffee.  I think we'll probably go with the perk.  After all,  cowboys on the range didn't carry a javapress.


Now for cleanup.  Towels soap, and bucket.  Well, the soap we've already got.  It's biodegradable and can be used on dishes, in your hair, and on your clothes and body, and is called simply camp soap.  For the towels we were thinking of getting pack towels, which sound like microfiber towels.  They're very lightweight and absorbent, and we're thinking of getting the bigger versions for our bodies.  The bucket we want to get is super cool!  It folds!  We saw this one at EMS (Eastern Mountain Sports) that we really like. Carrying water is also concern.  We might get an inflatable water container, which can be seen at EMS too.  We might also carry a plastic gallon jug.  It's something we haven't quite figured out yet.

Now how we'll light our campsite at night.  There are all kinds of LED flashlights and lanterns that are lightweight and small.  I think we'll go with one LED lantern and one LED headlamp.  The lantern can be ambient light.  The headlamp could be useful if we have to setup camp in the dark or if we have a bike issue in the dark.  We don't plan on riding at night but you never know.
I haven't picked out a headlamp yet, but the lantern I want to get is a Black Diamond Apollo.  I checked these out at EMS too and they're really tiny light, but very bright.  It runs on 4 AAs or a rechargeable pack sold by Black Diamond.  I'll need to do some more research to figure out which to get.  We won't always have access to electricity so we may have to go with batteries that get thrown away when dead (which I hate doing, I am usually a rechargeable fan).

So besides all this camping stuff we're also going to need clothes for our bodies.  Many motorcycle travelers get by with just one or two changes of clothes other than their riding gear.  I think we'll try for that.  We'll get a stuff sack for packing extra clothes.

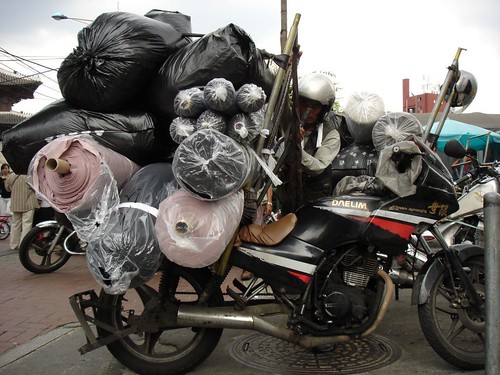
So that's most of what we'll bring.  I tried to be detailed but am sure other things will pop up.  We'll need to pack wisely to get everything on the bike.  We need to avoid packing like the picture up top!

Next posting, I'll probably talk about route ideas so stay tuned.
Jeremy B

Monday, October 26, 2009

Equipment: Outfitting the motorcycle for luggage


One of the driving forces behind this trip is that Juli and I are not wealthy barons.  We simply do not have the funds to fly to Europe and spend the summer hiking the alps and looking at Renaissance art in Florence, Venice, or Mantua.  The closest we can get to having a traveling adventure is riding our (old) motorcycle across our own country, camping along the way and experiencing national parks, museums, and historical places.  

So, maybe you saw that picture of our (old) motorcycle in all its smallness and lack of storage space and wondered how we plan on packing all the necessary gear for such an undertaking.  After all, goldwings have huge trunks and side cases that would hold two of each animal that walks the earth (or swims; those hard cases are waterproof too).  Well, here’s the plan:

 First of all, the bike came with an original equipment chrome luggage rack, which I am very happy about.  It is very handy for strapping whatever you need for a day trip with bunjee cords.  Plus it looks really cool! 
But for the trip the rack is going to serve as a platform for a genuine motorcycle top box, something like this:


These boxes are from JC Whitney and are fairly cheap  (under $100).  I found other such boxes from Givi, but I can’t justify spending twice as much money for a name brand top box.  I haven't decided the exact size top box I want yet.  I am waiting until we have more of our camping gear so I can better judge how much room we'll need.  I plan to add a luggage rack to the top of this box, where we can strap longer things like the tent or sleeping pads. 


We’ll also have a tank bag.  I haven't done a ton of research on these yet so I haven't picked one out.  Notice the clear pouch on top where you can insert a map!  We'll stuff things like a cell phone, change for tolls, water bottles, anything we need to get to quickly will go in here.  The cool thing about these is that they are magnetic, they literally just stick to the top of the gas tank.  This could be an issue for riders of modern bikes with fake gas tanks!   


The side cases have been by far the biggest technical challenge.  We decided to go with hard side cases for their strength and weather resistance.  In the 70s you could get Wixom hard luggage, similar to what early BMWs had.   You could also get Hondaline luggage, but I think that might have been later.  Nowadays, though, nobody makes hard luggage to fit these bikes.  Let me rephrase:  It's not really the luggage itself that is the problem.  Ebay currently has 300 listings for hard bags that we could probably use.  It's the racks that the luggage attaches to on the bike.  There are lots of manufacturers of hard luggage and racks to mount them, but nobody makes one for a 1971 Honda.  So I'll make my own. 


Thank goodness for the adventure rider's forum!  
advrider.com


This is a great website full of motorcycle traveling enthusiasts.  There are some serious folk on here who have circled the globe, so there is lots of great info on everything from route advice to bike advice to bulls#t advice.  This is where I discovered the idea of using hard cases like Pelican or Storm cases for luggage.
These are Pelican cases sold as a complete luggae system. by Cariboucases.com.  They are industrial hard plastic, extremely durable (used by EMTs, military, etc) and reasonably affordable.  
Caribou does not, however, make a mounting system for a 1971 Honda.  So I plan to make my own rack that will hold these cases. 


There are cheaper alternatives to using cases like these, but we do have some specific criteria that a side luggage system will have to meet.  The cases will need to hold quite a bit, but they cannot be too big.  We need them to be lightweight and they must not intrude on passenger leg room, the way some home made systems do.  There are two of us on this bike at all times, and it's a small bike!  So, while I enjoyed reading threads on advrider about making your own side cases out of ammo cans, the truth is that the big ones weigh in at 15-25 pounds each!  Some people were clever enough to weld their own steel cases, but I am not and those would still be too heavy.  Some people used mermite cans, a type of food container that the military used.  They are large and not very heavy once hollowed out, but they are simply too big for our bike.  I could even use the cheap ebay plastic side bags, but I would still have to fabricate a mounting system so I wouldn't save much money.  The durability of pelican/storm/hardigg type cases is superior anyway, so that's what we'll go with.


I have read countless posts on advrider describing how to make your own mounts for cases like these.  What I will do is make a tubular steel frame that will attach to the shock-mount stud and signal light bracket on my bike.  The signal lights will probably be taken off anyway, because I'll want to move the tail and signal lights forward to where they'll be more visible with all the luggage.  More on that later, as I figure it all out.  


 Here is a picture of what my rack will look like.  The bike pictured is a Triumph Bonneville, so mine will be very similar because the rear subframe of this bike is a lot like mine.  I am not yet sure if I will connect the rack to my existing luggage rack or if I will run a piece of metal across the bike to secure the two sides together and minimize movement.


I will drill holes in the plastic cases and attach a u-channel of aluminum to the bottom, and a turnable block of metal or plastic to the top.  There are many different ways to do this.  One that I especially like is pictured here:
So the cases themselves will be Pelican 1500 or something similar.  They are pretty big, roughly 6x12x17 inches on the inside.  To save some money I may go with Seahorse SE-720 cases, which are around the same size.  These cases can be had with locks for $60 each plus shipping.  So figure in maybe $50 for the stuff to build the mounting rack, and I've got a system that costs many more hundreds to buy.  Of course, that point is sort of moot anyway since nobody makes a system like that for my bike!  


  For an idea of how these cases would look on an old style, naked bike, here is an airhead beamer with pelicans attached, image stolen from somebody on the advrider forum.  These are pelican 1520s, a couple of sizes bigger than what I was looking at.  I may get gray instead of black.  Also, I too plan on using reflector tape on our cases.  Can't be too visible out there! 


So there you have it!  Those plastic cases aren't pretty, but they're big and strong yet light enough for us.  In addition to all of these cases and bags, we'll also get a fork bag for the front of the bike.  That bag will hold our tools and a quart of oil, maybe the chain lube too, we'll see how big they go!  

Next I'll write about just what we're going to put in all this luggage!  Stay tuned!!!!

Jeremy B